> ## Documentation Index
> Fetch the complete documentation index at: https://mintlify-mintlify-b23b57b8.mintlify.site/llms.txt
> Use this file to discover all available pages before exploring further.
# Custom domain
> Host your documentation on a custom domain with DNS configuration, automatic TLS certificates, and subdomain or subpath routing options.
To host your documentation on a custom domain:
1. Add your domain in your dashboard.
2. Configure DNS settings on your domain provider.
3. Allow time for DNS to propagate and TLS certificates to be automatically provisioned.
Looking to set up a subpath like `example.com/docs`? See [/docs subpath](/deploy/docs-subpath).
## Add your custom domain
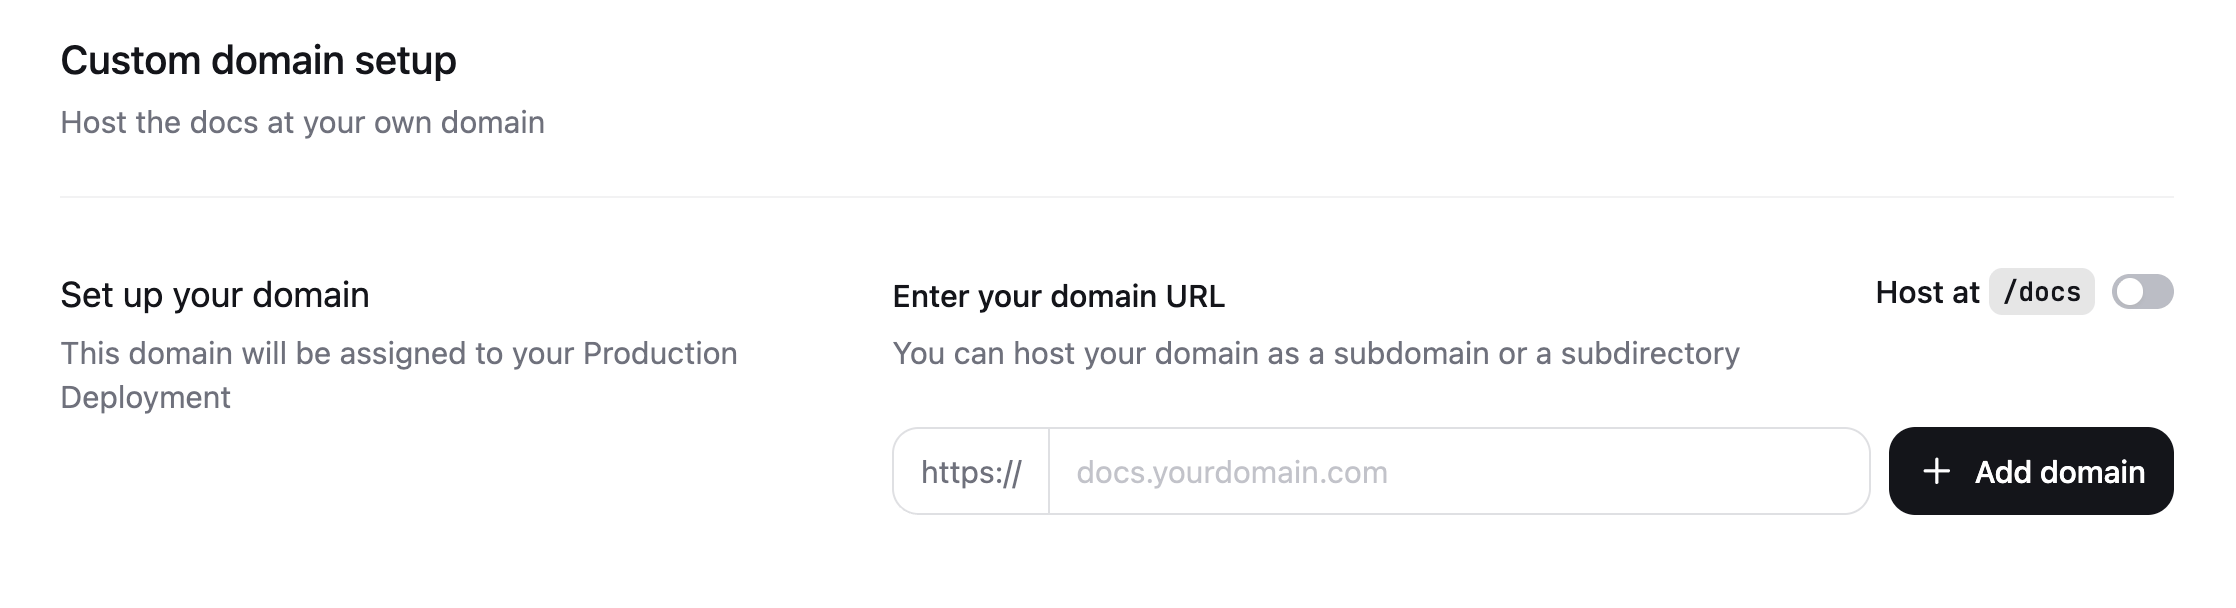
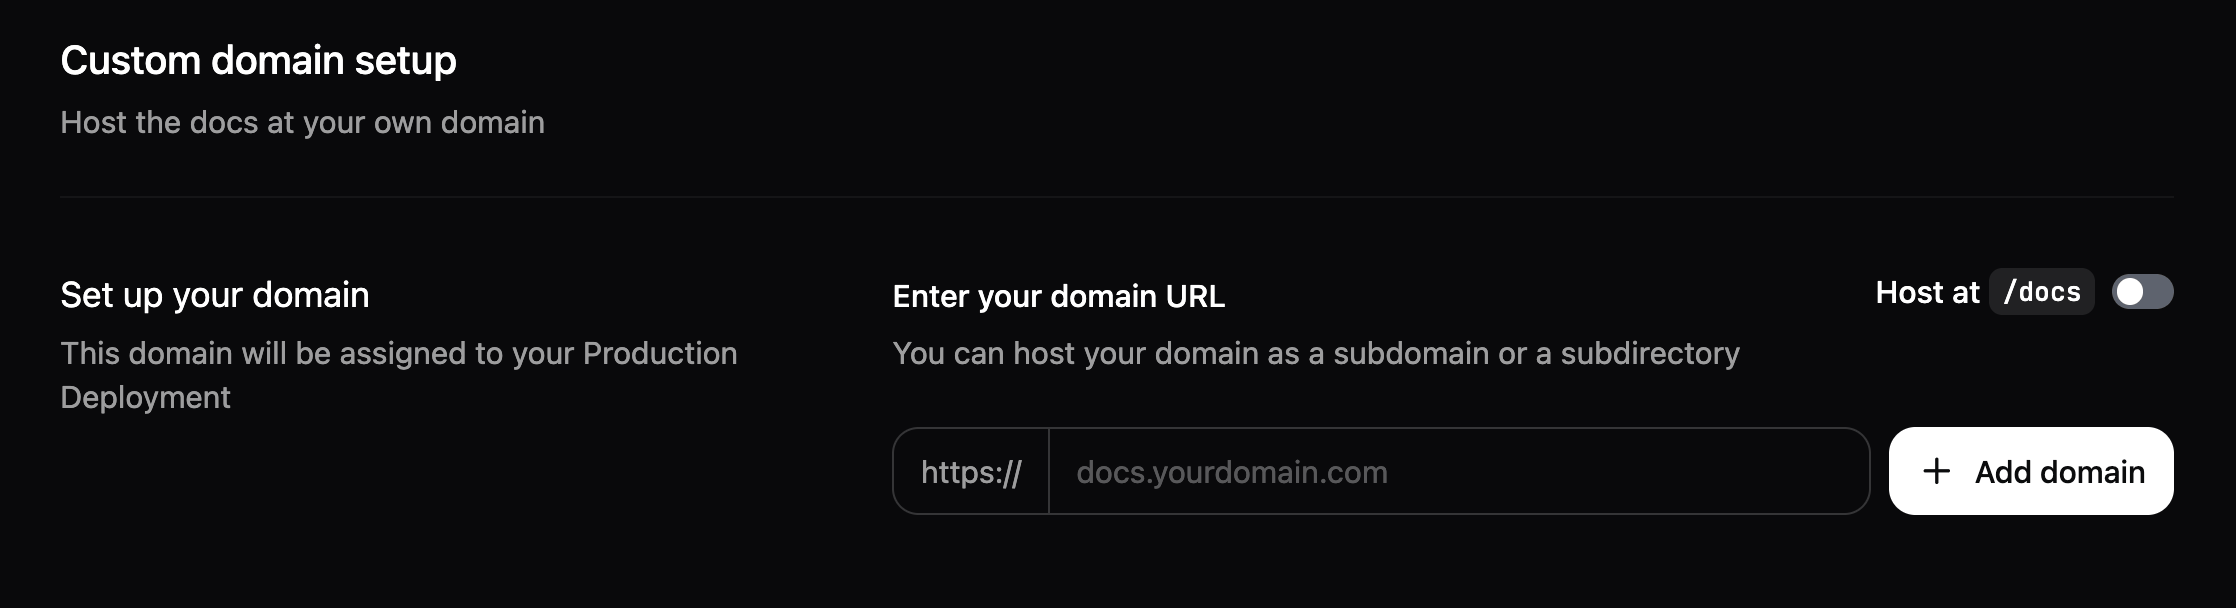
1. Navigate to the [Custom domain setup](https://app.mintlify.com/settings/deployment/custom-domain) page in your dashboard.
2. Enter your domain name. For example, `docs.example.com` or `www.example.com`.
3. Click **Add domain**.
 ## Configure your DNS
1. On your domain provider's website, navigate to your domain's DNS settings.
2. Create a new DNS record with the following values:
```text theme={null}
CNAME | docs | cname.mintlify.builders
```
Each domain provider has different ways to add DNS records. Refer to your domain provider's documentation for specific instructions.
Do not add or change your `CNAME` until both verification `TXT` records show as verified in your dashboard. Each appears with a green check when DNS is correct. The dashboard verifies `TXT` records before certificate provisioning can complete. Switching `CNAME` too early commonly breaks HTTPS until provisioning finishes.
If you migrate an existing domain and want zero downtime, publish the verification `TXT` records first and wait until they show verified and TLS has pre-provisioned before pointing `CNAME` at Mintlify.
This pre-validation flow does not work for domains proxied through Cloudflare. See [Cloudflare-proxied domains](#cloudflare-proxied-domains).
### Verification TXT records
After you add a custom domain, the dashboard displays two `TXT` records that you must add at your DNS provider:
```text theme={null}
TXT | _acme-challenge. |
TXT | _cf-custom-hostname. |
```
The `_acme-challenge` record authorizes Let's Encrypt to issue a TLS certificate for your domain, and the `_cf-custom-hostname` record verifies that you control the domain.
The dashboard polls DNS in the background and marks each record with a green check once it verifies the expected value. After saving records at your DNS provider, allow a short time for propagation before status updates appear.
### DNS propagation
DNS changes typically take 1-24 hours to propagate globally, though it can take up to 48 hours in some cases. Use a tool like [DNSChecker](https://dnschecker.org) to verify your DNS configuration is correct.
Once your DNS records are active, your documentation is first accessible via HTTP. HTTPS is available after Mintlify provisions your TLS certificate.
### Automatic TLS provisioning
After you add your `TXT` records and your DNS records resolve correctly, Mintlify generates a free SSL/TLS certificate for your site using Let's Encrypt.
This typically completes within a few hours of DNS propagation, though it can take up to 24 hours in rare cases. Certificates are automatically renewed before expiration.
### CAA records
If your domain uses CAA (Certification Authority Authorization) records, you must authorize Let's Encrypt to issue certificates for your domain. Add the following CAA record to your DNS settings:
```text theme={null}
0 issue "letsencrypt.org"
```
### Reserved paths
Mintlify reserves the `/.well-known/acme-challenge` path for certificate validation. You cannot redirect or rewrite this path. If you have configured redirects or rewrites for this path, certificate provisioning fails.
### Cloudflare-proxied domains
If your domain is already proxied through Cloudflare (the proxy status shows an orange cloud), the verification `TXT` records cannot show as verified before you update your `CNAME`. This happens even when the records resolve correctly with tools like `dig` or DNSChecker. Cloudflare's proxy prevents the verification from completing until traffic for the hostname routes to Mintlify.
For Cloudflare-proxied domains, follow these steps:
1. Add the verification `TXT` records at your DNS provider.
2. Update your `CNAME` record to point to `cname.mintlify.builders` without waiting for the `TXT` records to show as verified.
3. Wait for verification and TLS provisioning to complete. Your site may briefly serve an invalid certificate during provisioning.
If you need zero downtime during migration, set the `CNAME` record's proxy status to **DNS only** (gray cloud) instead. This allows the standard pre-validation flow to complete before you switch traffic.
### Provider-specific settings
If Cloudflare is your DNS provider, you must enable the "Full (strict)" mode for the SSL/TLS encryption setting. Additionally, disable "Always Use HTTPS" in your Edge Certificates settings. Cloudflare's HTTPS redirect blocks Let's Encrypt from validating your domain during certificate provisioning.
### Retry validation
If your domain is still pending validation after adding the verification `TXT` record, you can retry validation manually from your dashboard.
1. Navigate to the [Custom domain setup](https://app.mintlify.com/settings/deployment/custom-domain) page in your dashboard.
2. Find your pending custom domain.
3. Click **Retry validation**.
Only retry validation after you confirm that your DNS records are correct. Repeated retries with incorrect records do not speed up validation.
## Manage an existing custom domain
After your custom domain is live, you may need to change hosts, re-verify DNS, serve documentation across multiple domains, or decommission the domain.
### Change or replace a custom domain
To move your documentation to a different custom domain, for example from `www.example.com` to `docs.example.com`:
1. Navigate to the [Custom domain setup](https://app.mintlify.com/settings/deployment/custom-domain) page in your dashboard.
2. Remove the existing custom domain.
3. Add the new domain and follow the [DNS configuration](#configure-your-dns) steps for it.
4. After the new domain is verified and serving traffic, remove the old `CNAME` and verification `TXT` records at your DNS provider.
If you want zero downtime during the switch, keep the previous domain configured until the new domain shows as verified and TLS provisioning is complete. Then add a redirect at your DNS or hosting provider from the old hostname to the new one.
Only one primary custom domain is supported per project. To serve documentation on additional hostnames, see [Serve documentation across multiple domains](#serve-documentation-across-multiple-domains).
### Re-verify when TXT values change
The dashboard regenerates the `_acme-challenge` and `_cf-custom-hostname` `TXT` values under some conditions, including when you remove and re-add the domain, when you click **Retry validation** after a long delay, or when the underlying certificate order expires.
If verification is failing, always copy the values that are currently displayed in the dashboard rather than reusing values you saved earlier. Stale `TXT` values do not verify.
1. Open the [Custom domain setup](https://app.mintlify.com/settings/deployment/custom-domain) page and copy the `TXT` values that are currently shown.
2. At your DNS provider, replace any earlier `_acme-challenge.` and `_cf-custom-hostname.` records with the current values.
3. Wait for DNS propagation, then click **Retry validation**.
If you have removed and re-added the same domain and validation is still failing, delete both `TXT` records at your DNS provider, wait for propagation, and re-add the values that the dashboard shows after the re-add.
### Serve documentation across multiple domains
A single Mintlify project serves content from one primary custom domain. To make your documentation reachable from more than one hostname, choose one of the following patterns.
* **Redirect additional domains to your primary domain.** Configure a permanent redirect (HTTP 301) at your DNS or hosting provider from each additional hostname to your primary custom domain. This is the recommended pattern when you only need alternate URLs to resolve, and it preserves SEO through your [canonical URL](#set-a-canonical-url).
* **Serve different content per domain with multi-repository deployments.** [Multi-repository deployments](/deploy/multi-repo) let you combine multiple content sources under one project, with a dedicated URL path per source. Multi-repository deployments require an Enterprise plan.
* **Route with an external reverse proxy.** Use a [Cloudflare Worker](/deploy/cloudflare), [Vercel rewrites](/deploy/vercel), or a [custom reverse proxy](/deploy/reverse-proxy) to serve documentation at subpaths of different domains, for example `example.com/docs` and `example.io/docs`. The proxy is responsible for routing each hostname to `mintlify.site`.
### Release a custom domain
To stop serving documentation from a custom domain and revert to your `.mintlify.app` URL:
1. Navigate to the [Custom domain setup](https://app.mintlify.com/settings/deployment/custom-domain) page in your dashboard.
2. Remove the custom domain.
3. At your DNS provider, delete the `CNAME` record and the `_acme-challenge` and `_cf-custom-hostname` `TXT` records for the hostname.
After the domain is removed from your dashboard, Mintlify stops serving traffic for it and does not renew the TLS certificate. If you plan to reuse the same hostname on another platform, wait for DNS to propagate before pointing it elsewhere.
## Set a canonical URL
After configuring your DNS, set a canonical URL to ensure search engines index your preferred domain. A canonical URL tells search engines which version of your documentation is the primary one. This improves SEO when your documentation is accessible from multiple URLs and prevents issues with duplicate content.
Add the `canonical` meta tag to your `docs.json`:
```json theme={null}
"seo": {
"metatags": {
"canonical": "https://www.your-custom-domain-here.com"
}
}
```
Replace `https://www.your-custom-domain-here.com` with your actual custom domain. For example, if your custom domain is `docs.mintlify.com`, you would use:
```json theme={null}
"seo": {
"metatags": {
"canonical": "https://docs.mintlify.com"
}
}
```
## Configure your DNS
1. On your domain provider's website, navigate to your domain's DNS settings.
2. Create a new DNS record with the following values:
```text theme={null}
CNAME | docs | cname.mintlify.builders
```
Each domain provider has different ways to add DNS records. Refer to your domain provider's documentation for specific instructions.
Do not add or change your `CNAME` until both verification `TXT` records show as verified in your dashboard. Each appears with a green check when DNS is correct. The dashboard verifies `TXT` records before certificate provisioning can complete. Switching `CNAME` too early commonly breaks HTTPS until provisioning finishes.
If you migrate an existing domain and want zero downtime, publish the verification `TXT` records first and wait until they show verified and TLS has pre-provisioned before pointing `CNAME` at Mintlify.
This pre-validation flow does not work for domains proxied through Cloudflare. See [Cloudflare-proxied domains](#cloudflare-proxied-domains).
### Verification TXT records
After you add a custom domain, the dashboard displays two `TXT` records that you must add at your DNS provider:
```text theme={null}
TXT | _acme-challenge. |
TXT | _cf-custom-hostname. |
```
The `_acme-challenge` record authorizes Let's Encrypt to issue a TLS certificate for your domain, and the `_cf-custom-hostname` record verifies that you control the domain.
The dashboard polls DNS in the background and marks each record with a green check once it verifies the expected value. After saving records at your DNS provider, allow a short time for propagation before status updates appear.
### DNS propagation
DNS changes typically take 1-24 hours to propagate globally, though it can take up to 48 hours in some cases. Use a tool like [DNSChecker](https://dnschecker.org) to verify your DNS configuration is correct.
Once your DNS records are active, your documentation is first accessible via HTTP. HTTPS is available after Mintlify provisions your TLS certificate.
### Automatic TLS provisioning
After you add your `TXT` records and your DNS records resolve correctly, Mintlify generates a free SSL/TLS certificate for your site using Let's Encrypt.
This typically completes within a few hours of DNS propagation, though it can take up to 24 hours in rare cases. Certificates are automatically renewed before expiration.
### CAA records
If your domain uses CAA (Certification Authority Authorization) records, you must authorize Let's Encrypt to issue certificates for your domain. Add the following CAA record to your DNS settings:
```text theme={null}
0 issue "letsencrypt.org"
```
### Reserved paths
Mintlify reserves the `/.well-known/acme-challenge` path for certificate validation. You cannot redirect or rewrite this path. If you have configured redirects or rewrites for this path, certificate provisioning fails.
### Cloudflare-proxied domains
If your domain is already proxied through Cloudflare (the proxy status shows an orange cloud), the verification `TXT` records cannot show as verified before you update your `CNAME`. This happens even when the records resolve correctly with tools like `dig` or DNSChecker. Cloudflare's proxy prevents the verification from completing until traffic for the hostname routes to Mintlify.
For Cloudflare-proxied domains, follow these steps:
1. Add the verification `TXT` records at your DNS provider.
2. Update your `CNAME` record to point to `cname.mintlify.builders` without waiting for the `TXT` records to show as verified.
3. Wait for verification and TLS provisioning to complete. Your site may briefly serve an invalid certificate during provisioning.
If you need zero downtime during migration, set the `CNAME` record's proxy status to **DNS only** (gray cloud) instead. This allows the standard pre-validation flow to complete before you switch traffic.
### Provider-specific settings
If Cloudflare is your DNS provider, you must enable the "Full (strict)" mode for the SSL/TLS encryption setting. Additionally, disable "Always Use HTTPS" in your Edge Certificates settings. Cloudflare's HTTPS redirect blocks Let's Encrypt from validating your domain during certificate provisioning.
### Retry validation
If your domain is still pending validation after adding the verification `TXT` record, you can retry validation manually from your dashboard.
1. Navigate to the [Custom domain setup](https://app.mintlify.com/settings/deployment/custom-domain) page in your dashboard.
2. Find your pending custom domain.
3. Click **Retry validation**.
Only retry validation after you confirm that your DNS records are correct. Repeated retries with incorrect records do not speed up validation.
## Manage an existing custom domain
After your custom domain is live, you may need to change hosts, re-verify DNS, serve documentation across multiple domains, or decommission the domain.
### Change or replace a custom domain
To move your documentation to a different custom domain, for example from `www.example.com` to `docs.example.com`:
1. Navigate to the [Custom domain setup](https://app.mintlify.com/settings/deployment/custom-domain) page in your dashboard.
2. Remove the existing custom domain.
3. Add the new domain and follow the [DNS configuration](#configure-your-dns) steps for it.
4. After the new domain is verified and serving traffic, remove the old `CNAME` and verification `TXT` records at your DNS provider.
If you want zero downtime during the switch, keep the previous domain configured until the new domain shows as verified and TLS provisioning is complete. Then add a redirect at your DNS or hosting provider from the old hostname to the new one.
Only one primary custom domain is supported per project. To serve documentation on additional hostnames, see [Serve documentation across multiple domains](#serve-documentation-across-multiple-domains).
### Re-verify when TXT values change
The dashboard regenerates the `_acme-challenge` and `_cf-custom-hostname` `TXT` values under some conditions, including when you remove and re-add the domain, when you click **Retry validation** after a long delay, or when the underlying certificate order expires.
If verification is failing, always copy the values that are currently displayed in the dashboard rather than reusing values you saved earlier. Stale `TXT` values do not verify.
1. Open the [Custom domain setup](https://app.mintlify.com/settings/deployment/custom-domain) page and copy the `TXT` values that are currently shown.
2. At your DNS provider, replace any earlier `_acme-challenge.` and `_cf-custom-hostname.` records with the current values.
3. Wait for DNS propagation, then click **Retry validation**.
If you have removed and re-added the same domain and validation is still failing, delete both `TXT` records at your DNS provider, wait for propagation, and re-add the values that the dashboard shows after the re-add.
### Serve documentation across multiple domains
A single Mintlify project serves content from one primary custom domain. To make your documentation reachable from more than one hostname, choose one of the following patterns.
* **Redirect additional domains to your primary domain.** Configure a permanent redirect (HTTP 301) at your DNS or hosting provider from each additional hostname to your primary custom domain. This is the recommended pattern when you only need alternate URLs to resolve, and it preserves SEO through your [canonical URL](#set-a-canonical-url).
* **Serve different content per domain with multi-repository deployments.** [Multi-repository deployments](/deploy/multi-repo) let you combine multiple content sources under one project, with a dedicated URL path per source. Multi-repository deployments require an Enterprise plan.
* **Route with an external reverse proxy.** Use a [Cloudflare Worker](/deploy/cloudflare), [Vercel rewrites](/deploy/vercel), or a [custom reverse proxy](/deploy/reverse-proxy) to serve documentation at subpaths of different domains, for example `example.com/docs` and `example.io/docs`. The proxy is responsible for routing each hostname to `mintlify.site`.
### Release a custom domain
To stop serving documentation from a custom domain and revert to your `.mintlify.app` URL:
1. Navigate to the [Custom domain setup](https://app.mintlify.com/settings/deployment/custom-domain) page in your dashboard.
2. Remove the custom domain.
3. At your DNS provider, delete the `CNAME` record and the `_acme-challenge` and `_cf-custom-hostname` `TXT` records for the hostname.
After the domain is removed from your dashboard, Mintlify stops serving traffic for it and does not renew the TLS certificate. If you plan to reuse the same hostname on another platform, wait for DNS to propagate before pointing it elsewhere.
## Set a canonical URL
After configuring your DNS, set a canonical URL to ensure search engines index your preferred domain. A canonical URL tells search engines which version of your documentation is the primary one. This improves SEO when your documentation is accessible from multiple URLs and prevents issues with duplicate content.
Add the `canonical` meta tag to your `docs.json`:
```json theme={null}
"seo": {
"metatags": {
"canonical": "https://www.your-custom-domain-here.com"
}
}
```
Replace `https://www.your-custom-domain-here.com` with your actual custom domain. For example, if your custom domain is `docs.mintlify.com`, you would use:
```json theme={null}
"seo": {
"metatags": {
"canonical": "https://docs.mintlify.com"
}
}
```